What’s the big deal with “sampling”? Biased samples = biased results no matter how good Accuvin tests are.
I’d like to start the discussion with the concept of sample imprecision. Sample imprecision arises when a sample is taken that is not representative of the bulk material from which it came. In most situations the sample taken for analysis is not the sample actual used for testing. The sample used for testing is a subsample of the initial sample, and it, too, is subject to significant sample imprecision. As an example, let’s consider a small batch fermenting in an open bin. Punch down takes place a couple of times a day. You need a bulk sample to check on the status of fermentation. You punch through a section of the cap, scoop up some slurry with a kitchen strainer, and let it drip into a large plastic beaker. Is that liquid really the same as the liquid in the bottom corner of the bin? Now you take your bulk sample to your testing station and place it on the counter while you calibrate/check your equipment and reagents. Time passes! You pipette out 5 mL for a TA test. After 10-15 min for this test you pipette out 10 – 20 microliters from the top of the sample for an enzymatic sugar test. Since you brought the sample to the test station it has been settling, and the top has been exposed to oxygen in the atmosphere. Is it still a uniform sample? These are some of the sources of bias in samples and in sub-samples.
So, how can we get a less biased sample?
1. Always mix vigorously before taking a sample. There are macro particles present in musts and wines (e.g., skin, seeds), but there are also micro particles present (e.g., tartrate crystals, yeast cells). Gravity is still working!
2. Avoid “grab samples.” These are samples taken from an area that’s convenient. They are not representative of the bulk. Mix, then use a sampler that can take a sample from top to the bottom of the tank or barrel. These can be sample bottles with small necks that fill slowly as they sink. They can be sample bottles attached to a stick of some kind with a cork attached to a string. The bottle is lowered to different depths, then the cork is popped with the sting. This way several samples can be taken and pooled for a representative sample of the bulk. And by all means, don’t just probe the center. Sample the corners as well.
3. Avoid “solids.” This is really a two part process. Freshly crushed juice and fermenting red musts have lots of skin components. The wine batch should be aggressively stirred to ensure that these skins are adequately represented in the sample. Before actual analysis the sample needs to be “pressed” in a process similar to the one you’ll use later. I recently crushed some grapes and ran a TA on a juice + skins portion, and then on a juice only portion I got by squeezing the sample gently through a hand garlic press. The TA was more than 10% higher in the sample with the skins compared to the “pressed” sample. Skins and other solids do not have the same concentrations of components as the juice portion which is used for wine.
4. It’s best to take samples after racking. While settling, tartrate crystals will be at a higher level near the bottom. (Remember gravity.) Phenolics will also be slightly higher near the bottom, as will the particulate debris from fermentation. Conversely, free SO2 levels will be lower near the bottom because of a greater concentration of components to which it binds. Unless, of course, you have a leaky bung and oxygen is seeping in at the top can reacting with the SO2 near the surface. Then the middle will have the highest level. Use the method of sampling suggested in #2.
5. Minimize steps. Since every sample, sub-sample, and processing steps adds variability, consider testing methods that allow for getting the information you need right at the side of the barrel, carboy, or tank.
6. Watch out for valve samples. Sampling from a valve requires that the stream flow for a short period to ensure any buildup is cleared. But valve sampling can be a problem for analytes such as O2 or SO2. These components in the wine or must are in equilibrium with the atmosphere. Valves are located near the bottom of the tank, and are under pressure. When you open the valve for a sample, there is a sudden, large change in pressure, a significant shift in equilibrium, and a change in the concentration of the dissolved component.
7. Remember that wine is alive, especially during primary and secondary fermentations. A sample may not behave the same way as the bulk because it’s at a different temperature, more or less exposed to oxygen, and for many other reasons. The quicker a sample can be analyzed the more it will represent the bulk from which it was taken.
I hope these suggestions help you make better wines by providing a way to get more reliable samples for testing.
References:
1. Pierre Gy, “Sampling for Analytical Purposes,” J. Wiley & Sons, New York 1998
2. Pierre Gy, “Sampling of heterogeneous and dynamic material systems,” Elsevier, New York 1992
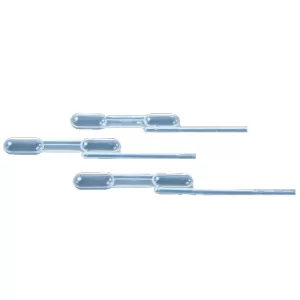
Provided in Quick Test™ Kits are samplers to obtain the exact sample amount required by a particular test. Originally invented for medical testing, these samplers are extremely accurate because they replace complicated and confusing instruments, have an overflow bulb to prevent inaccurate amounts of sample being used, and come in various sizes to enable the use of the most reliable sample amounts required for a particular test.
